Flutter Social Authentication
1.Sign in with Apple
Configure Sign in with Apple for iOS
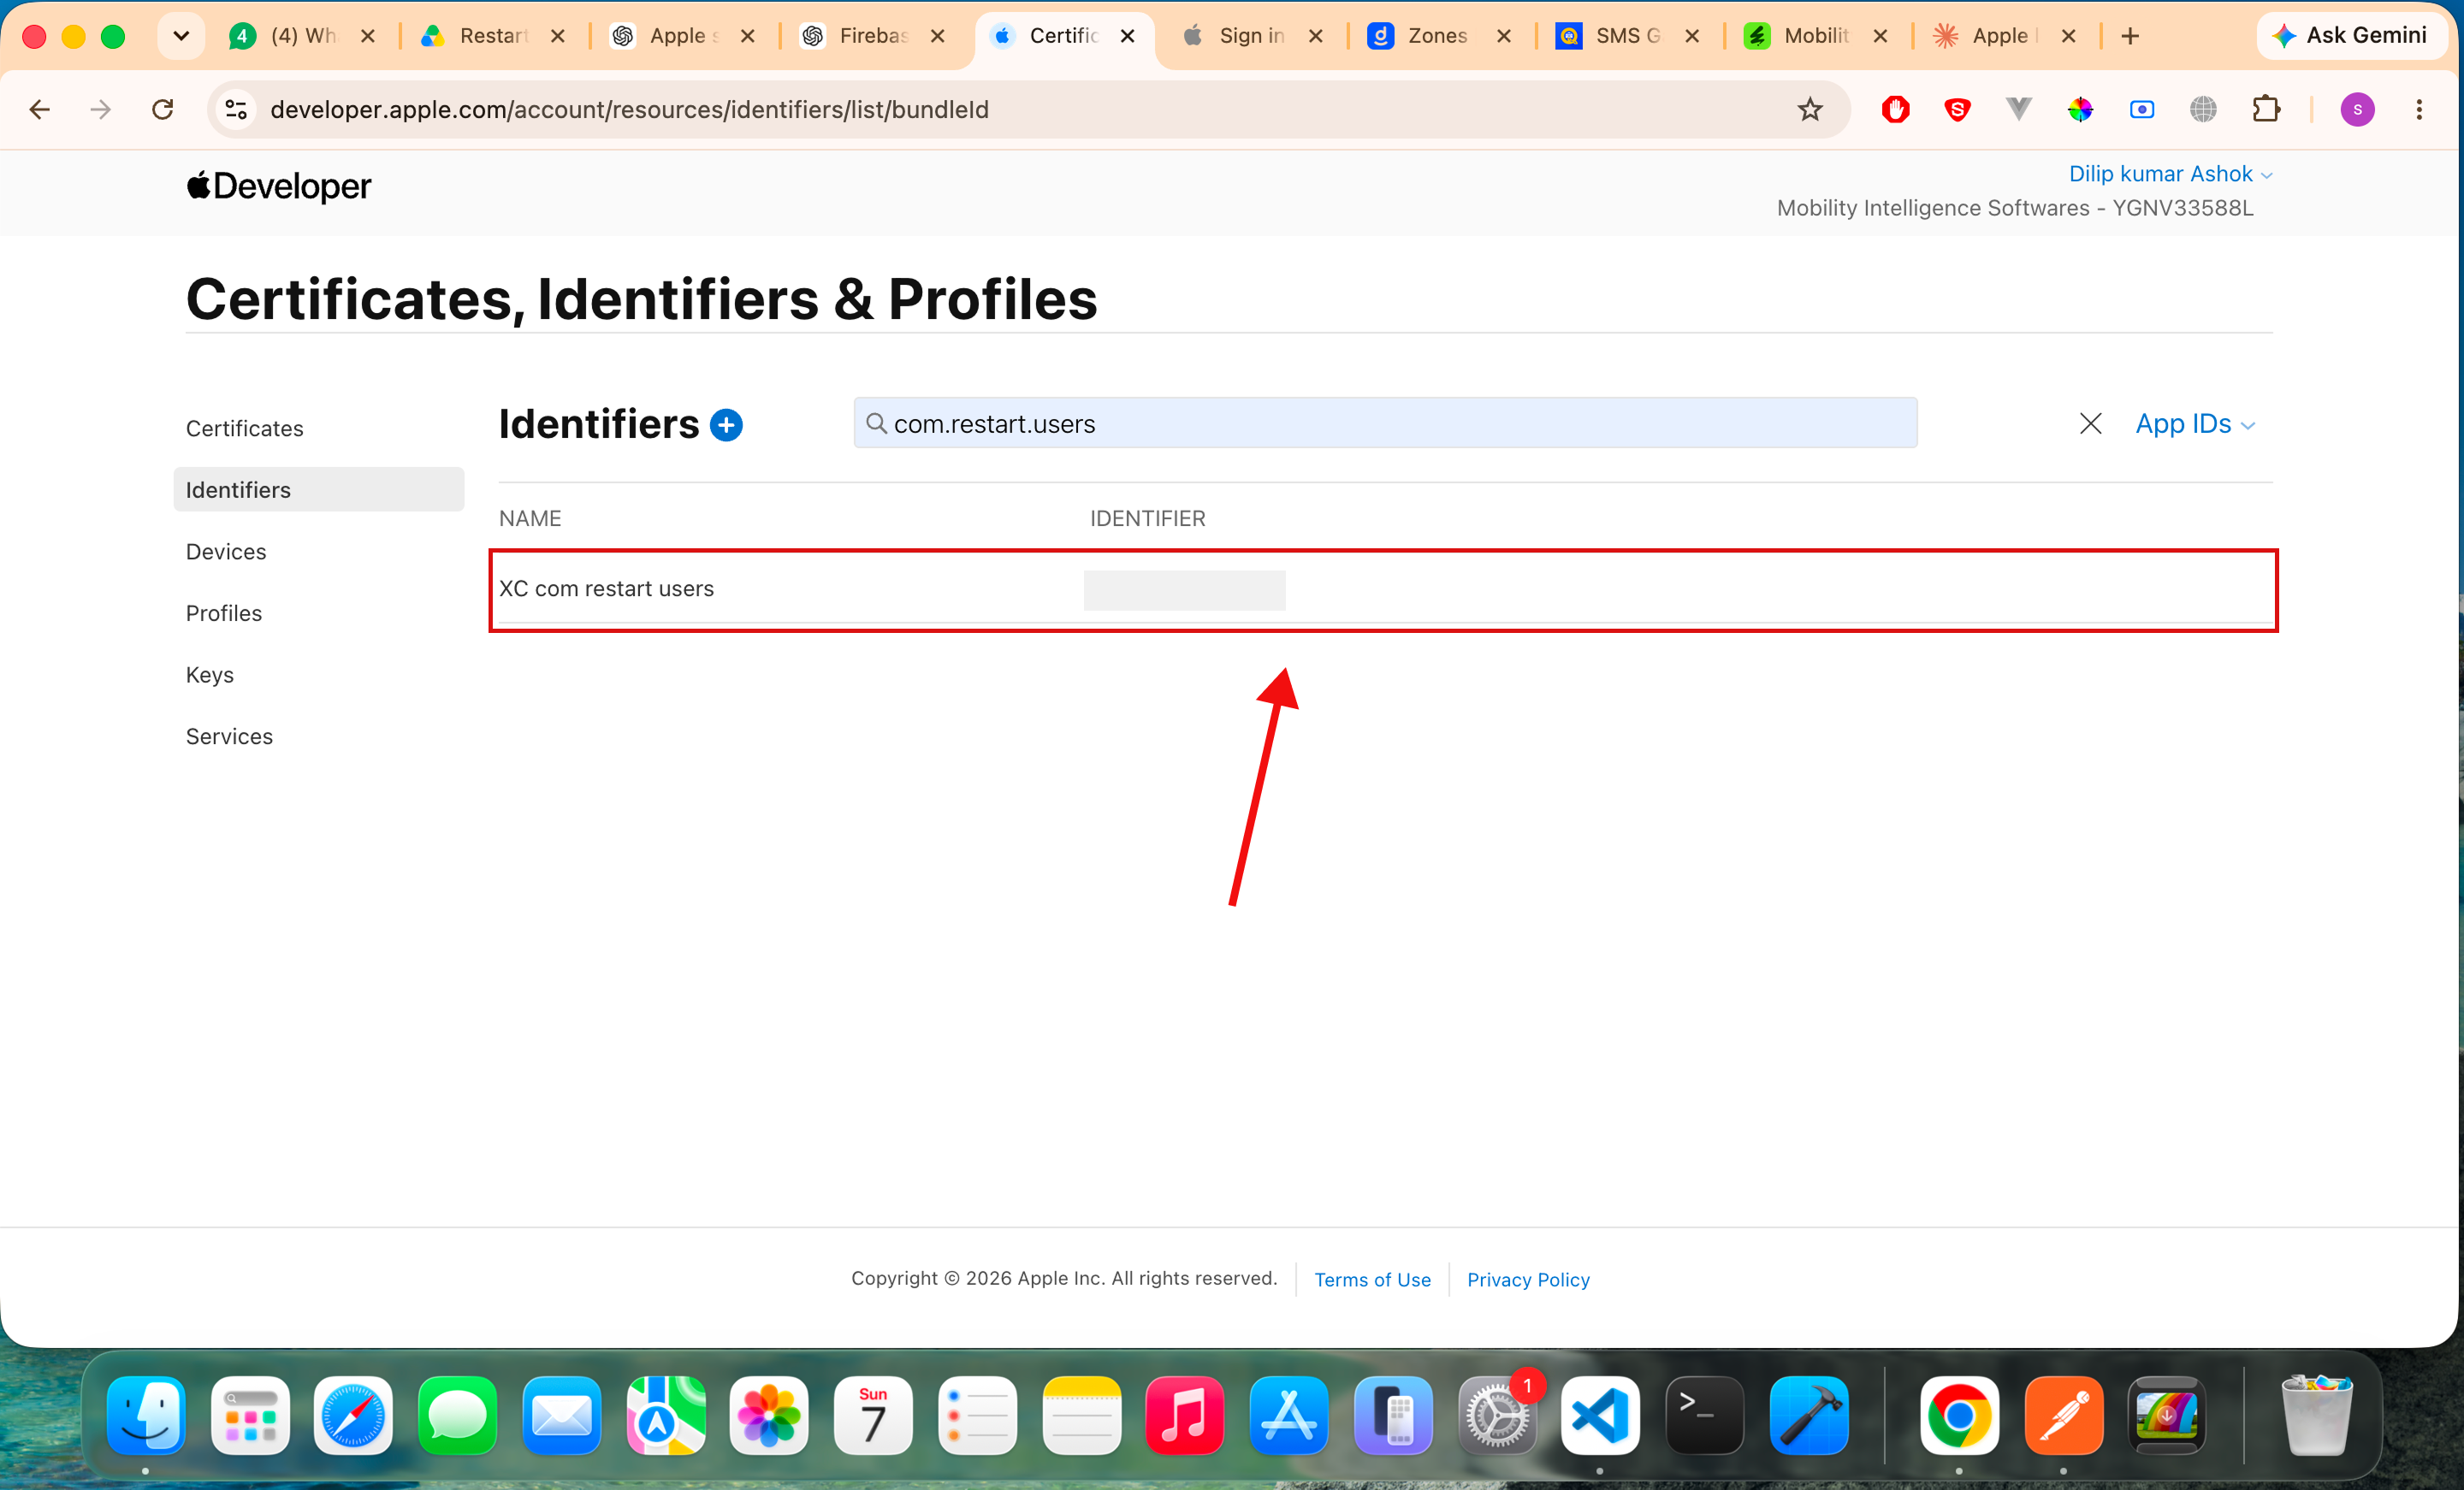
Step 1: Enable Sign in with Apple in Apple Developer Account
- Sign in to your Apple Developer account.
-
Navigate to
Certificates → Identifiers - Select Identifiers from the left navigation menu.
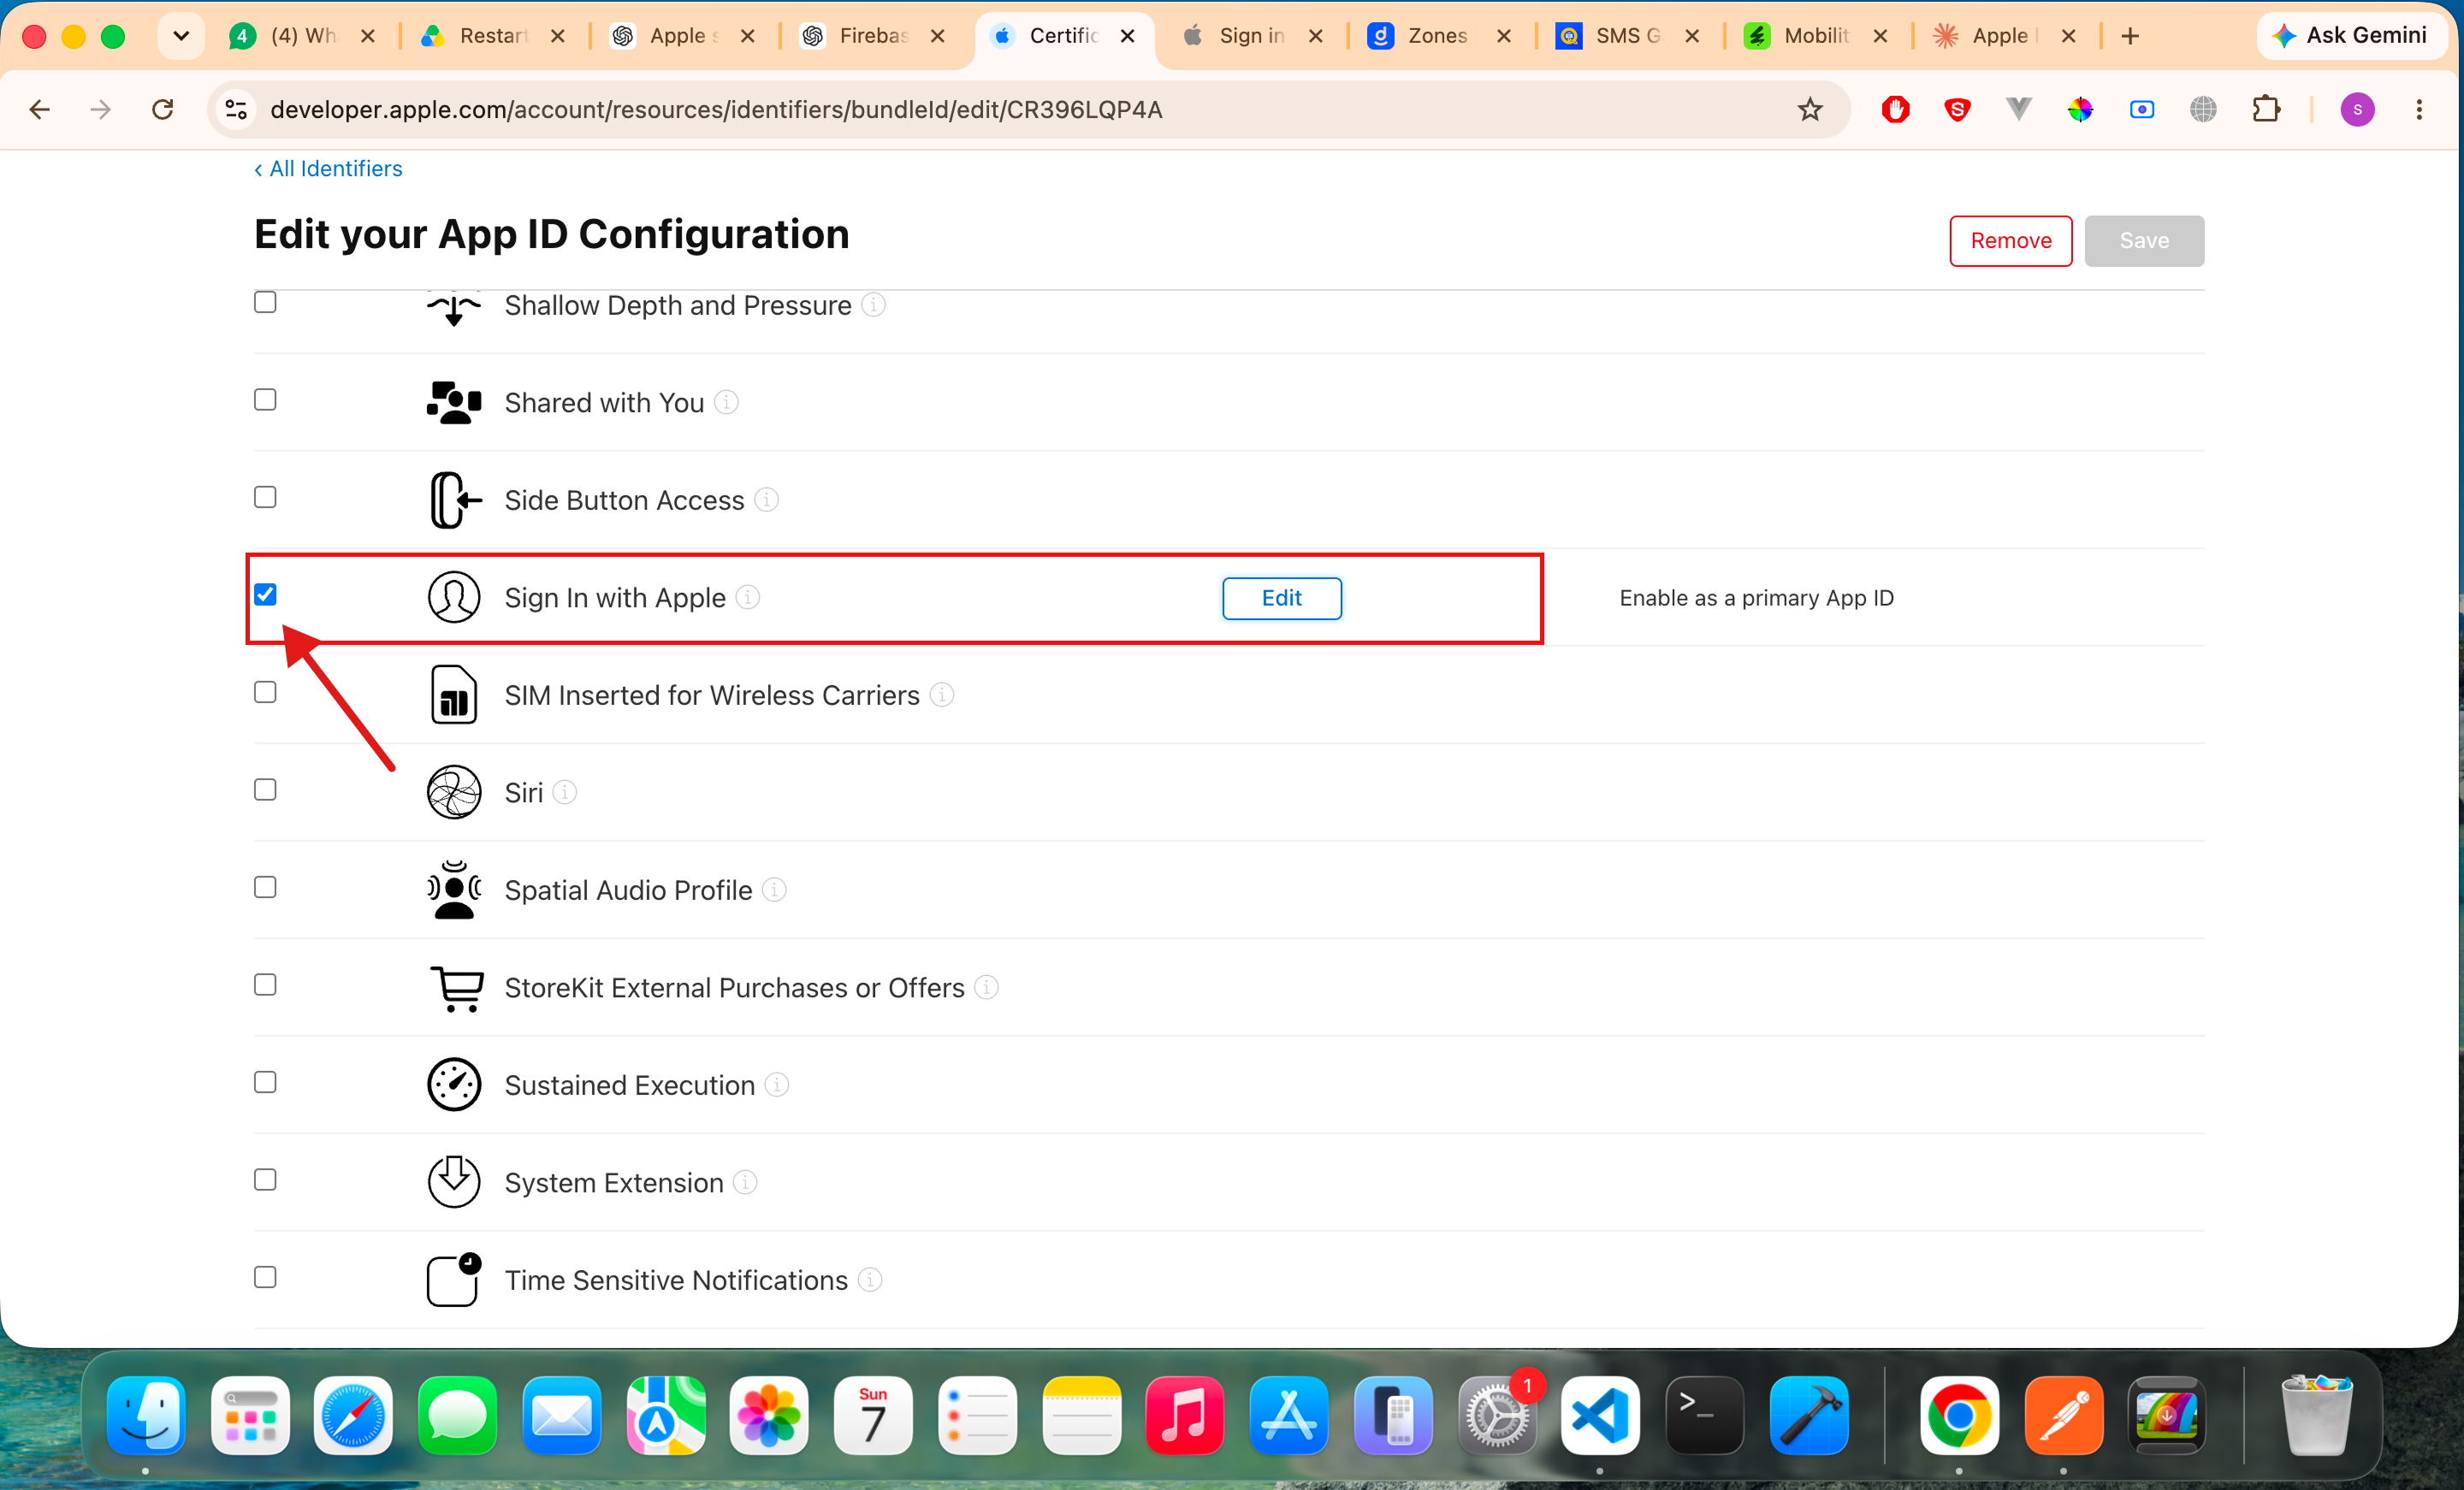
- Locate and select your application's App ID.
- Under the Capabilities section, enable Sign in with Apple.
- Save the changes.
Step 2: Configure Sign in with Apple in Xcode
- Open your iOS project in Xcode.
- Select your project from the Project Navigator.
- Verify that the Team and Bundle Identifier match the configuration created in the Apple Developer Portal.
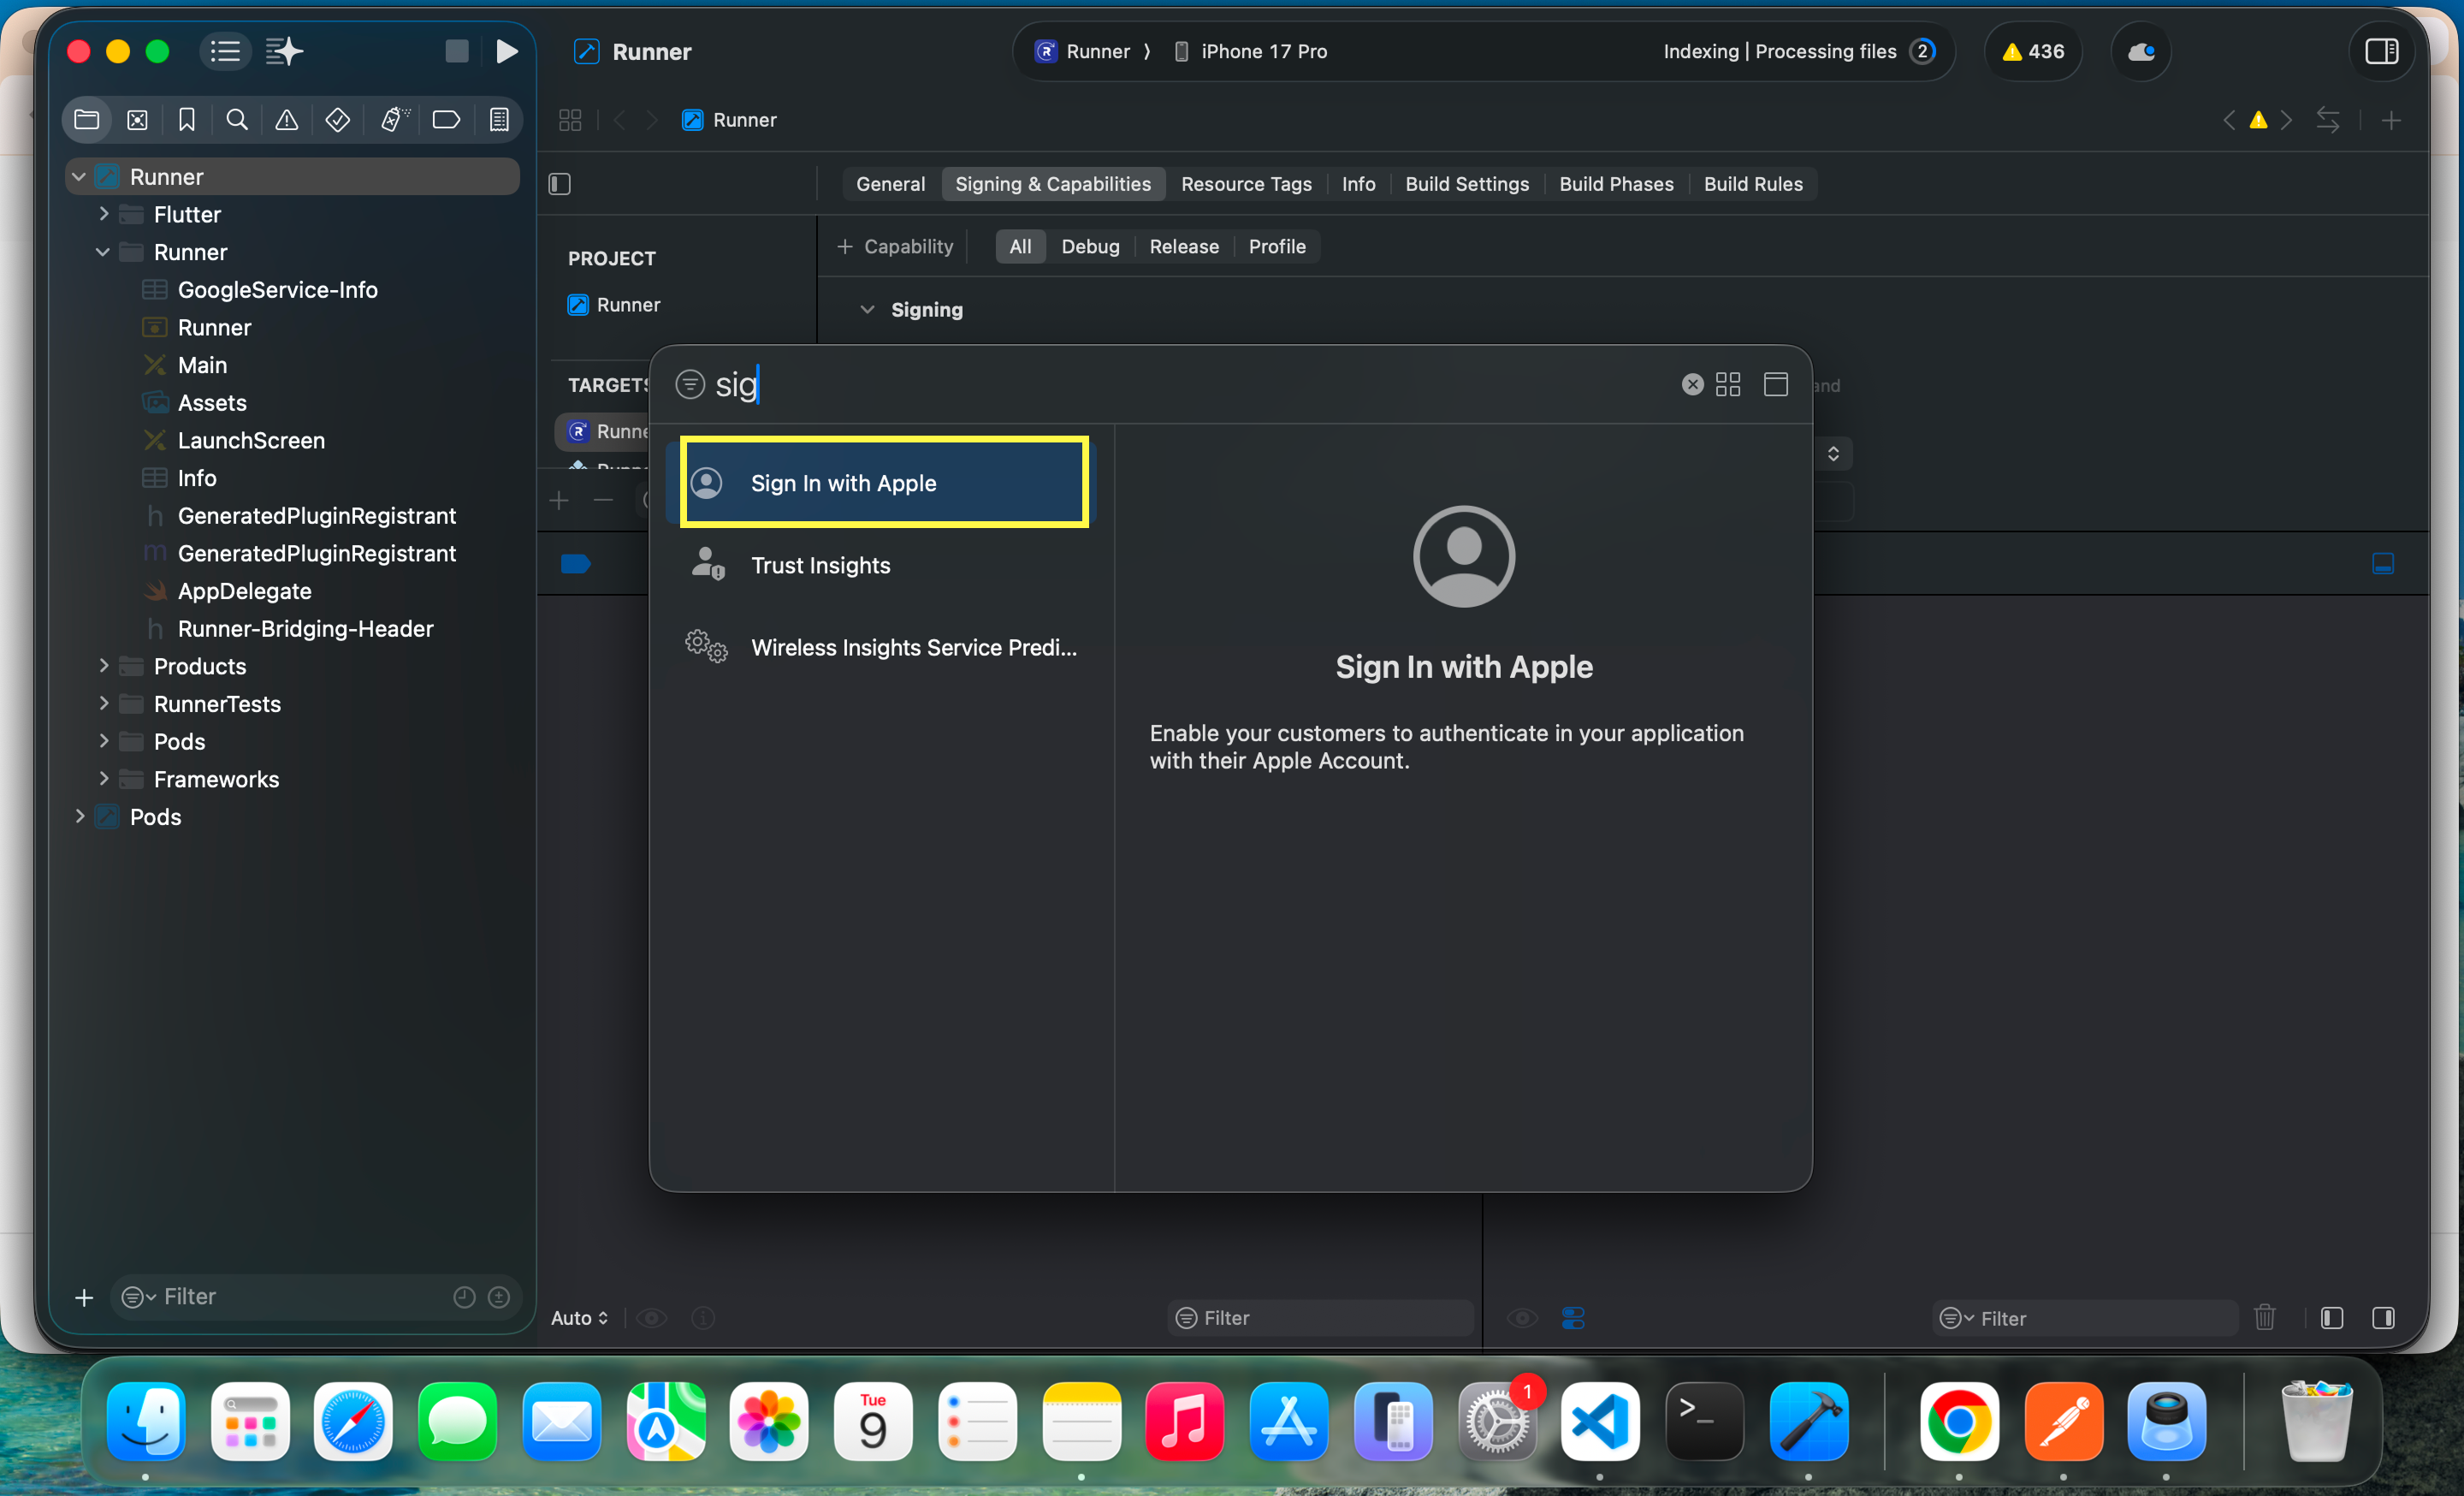
- Open the Signing & Capabilities tab.
- Click + Capability.
- Search for Sign in with Apple.
- Select Sign in with Apple from the list of available capabilities.
- Xcode will automatically add the required entitlement to your project.
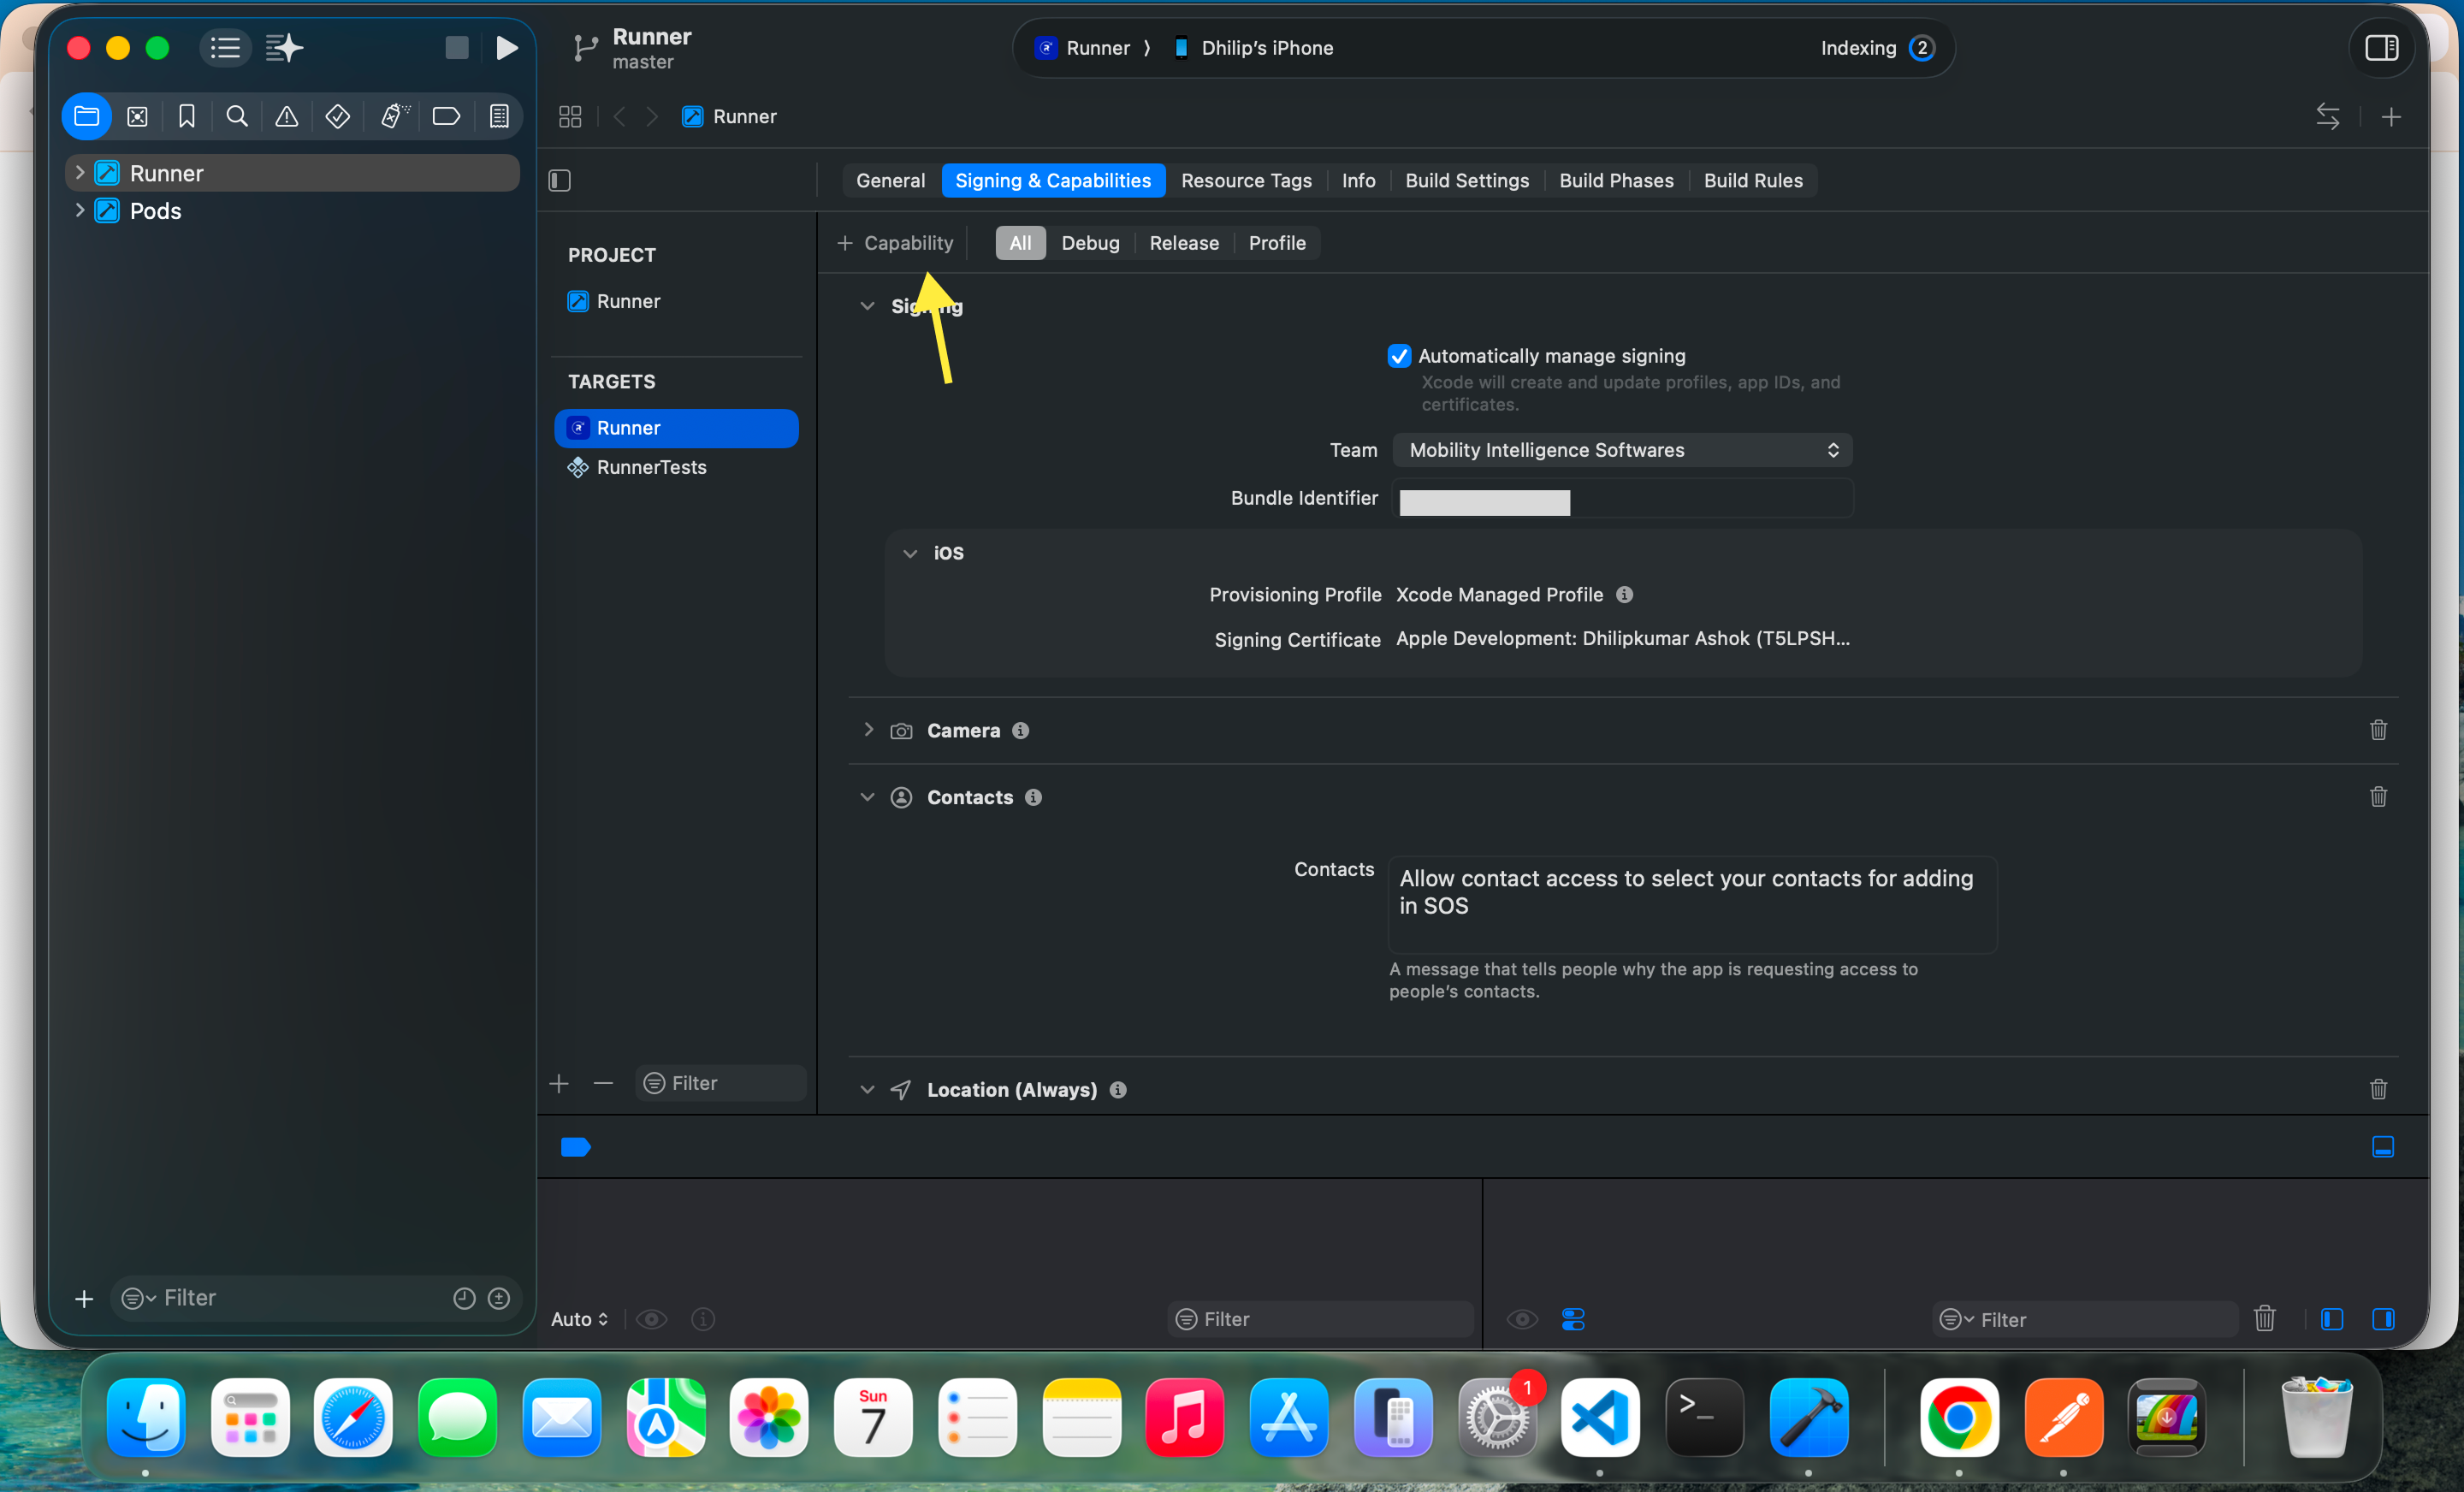
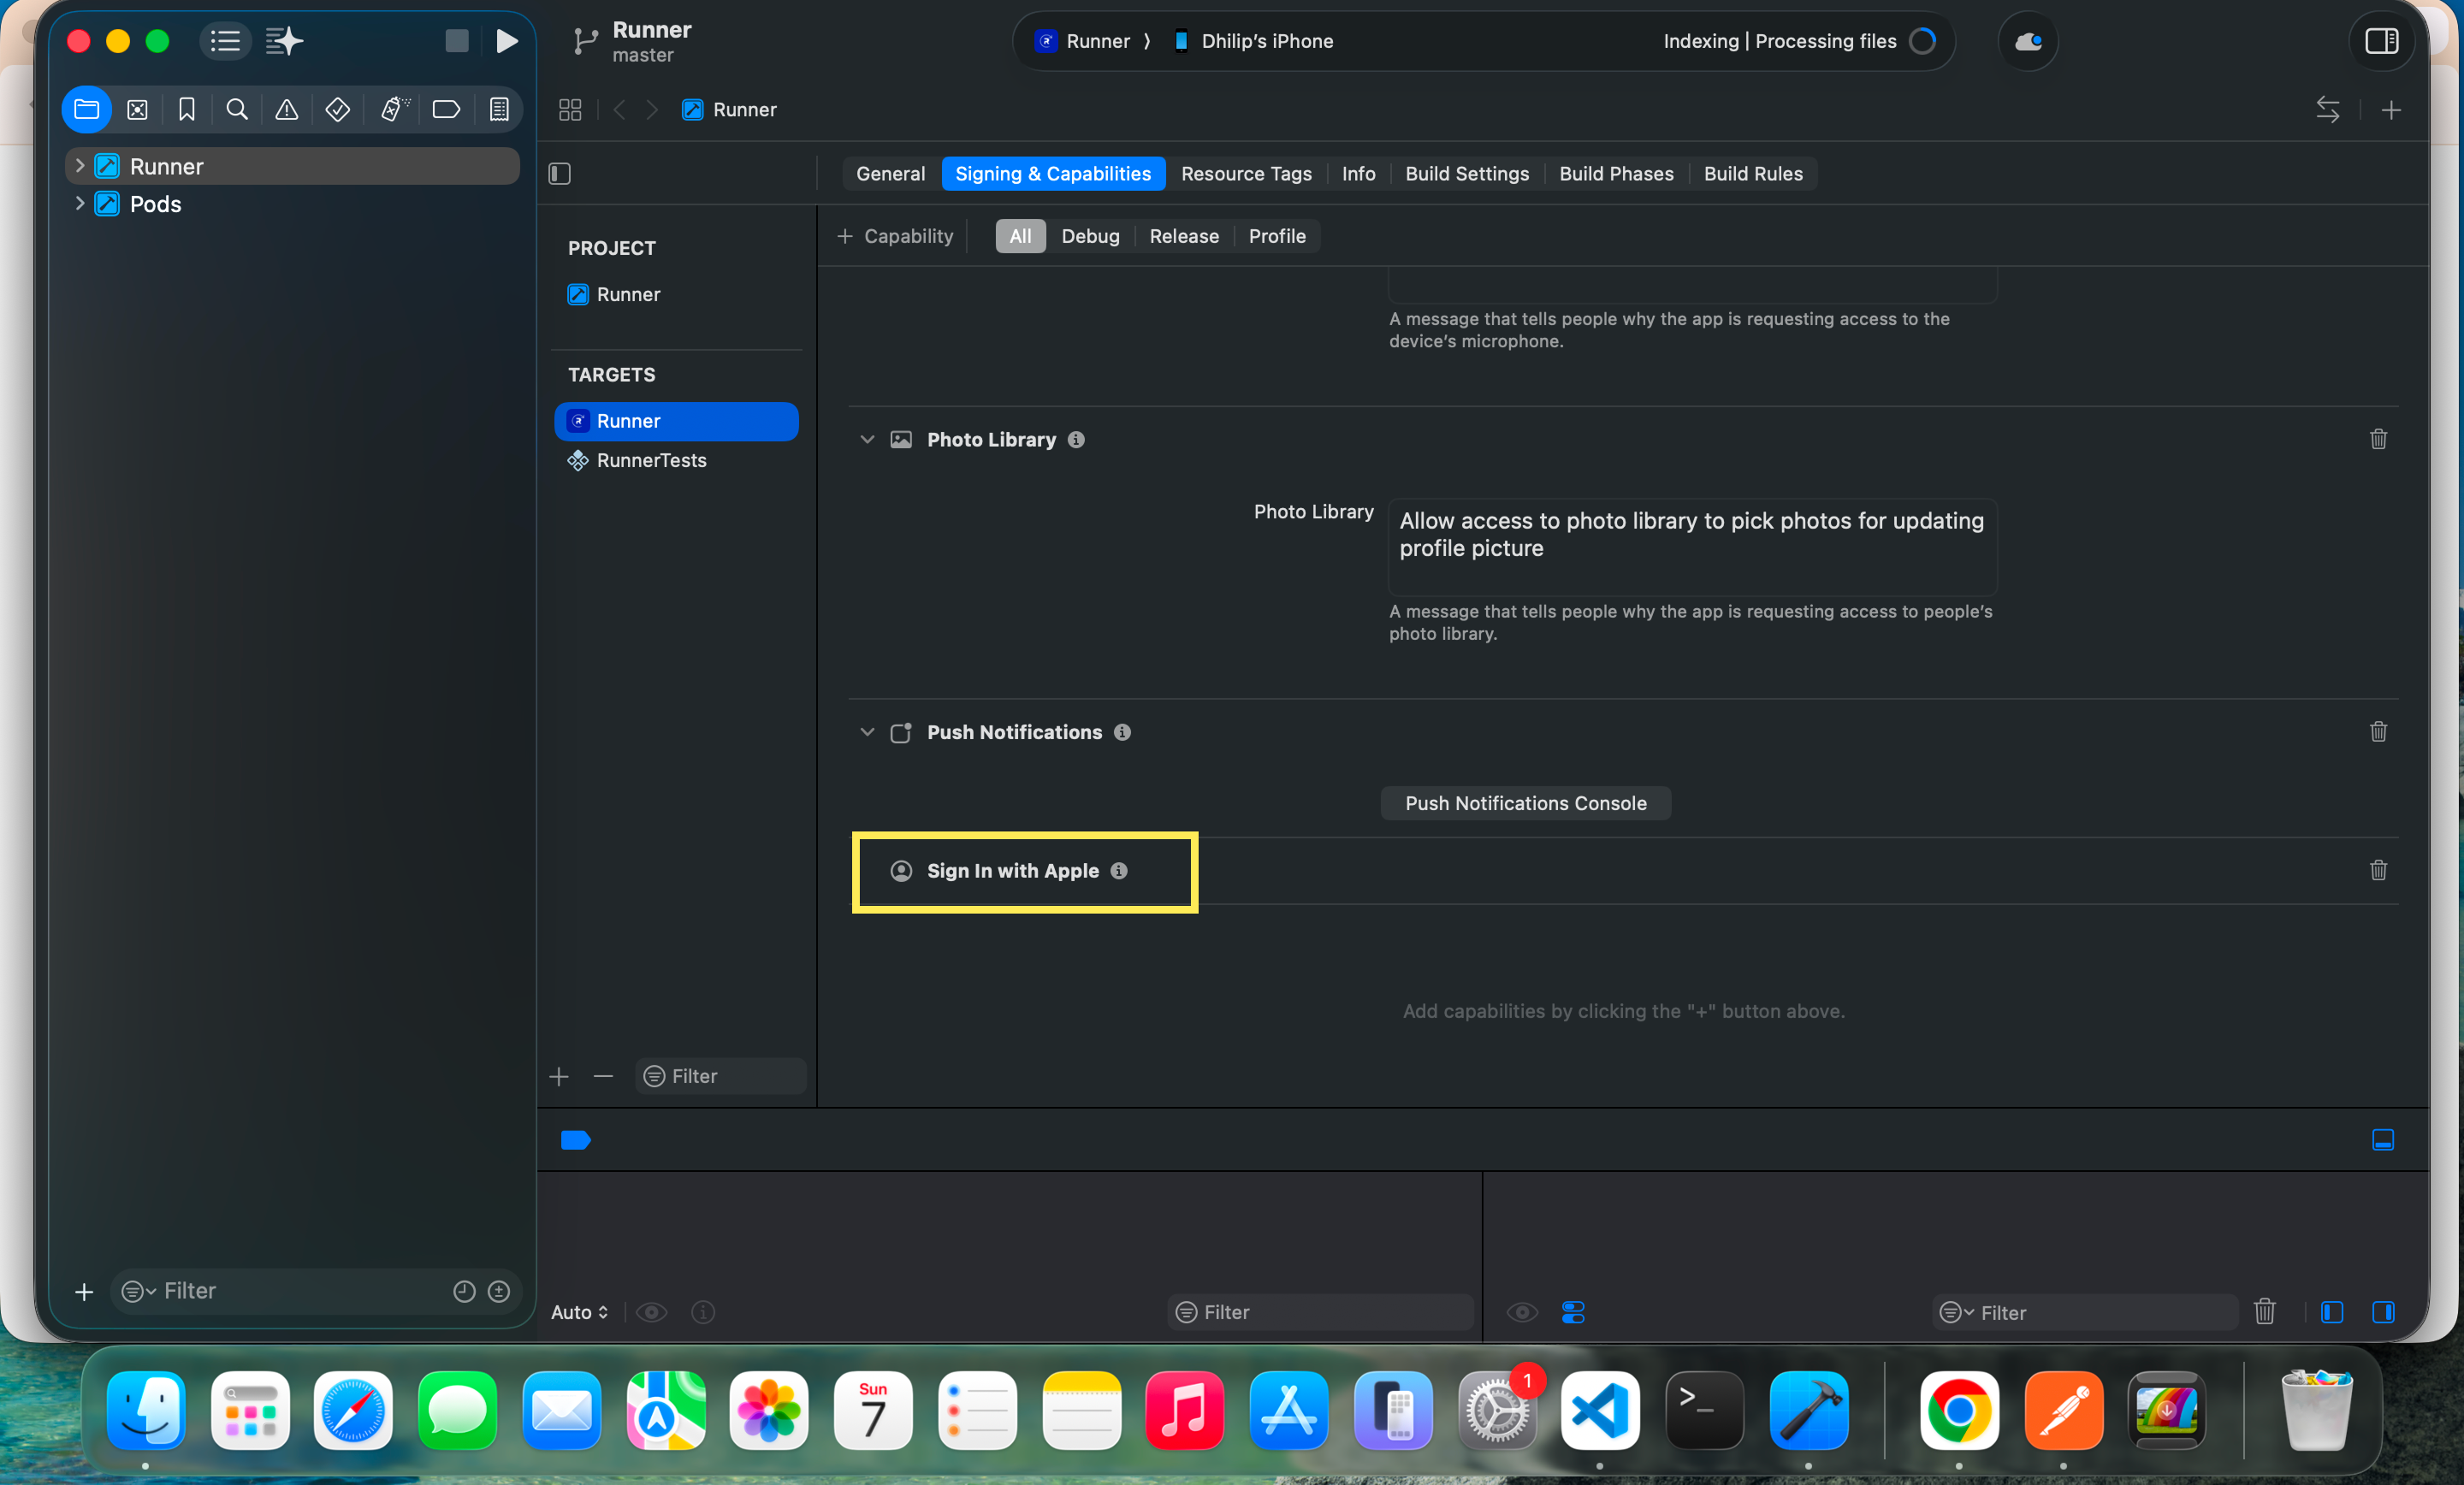
Step 3: Verify Configuration
- Scroll through the Signing & Capabilities section.
- Confirm that Sign in with Apple appears in the list of enabled capabilities.
- Ensure there are no signing or provisioning profile errors.
Configure Sign in with Apple for Google
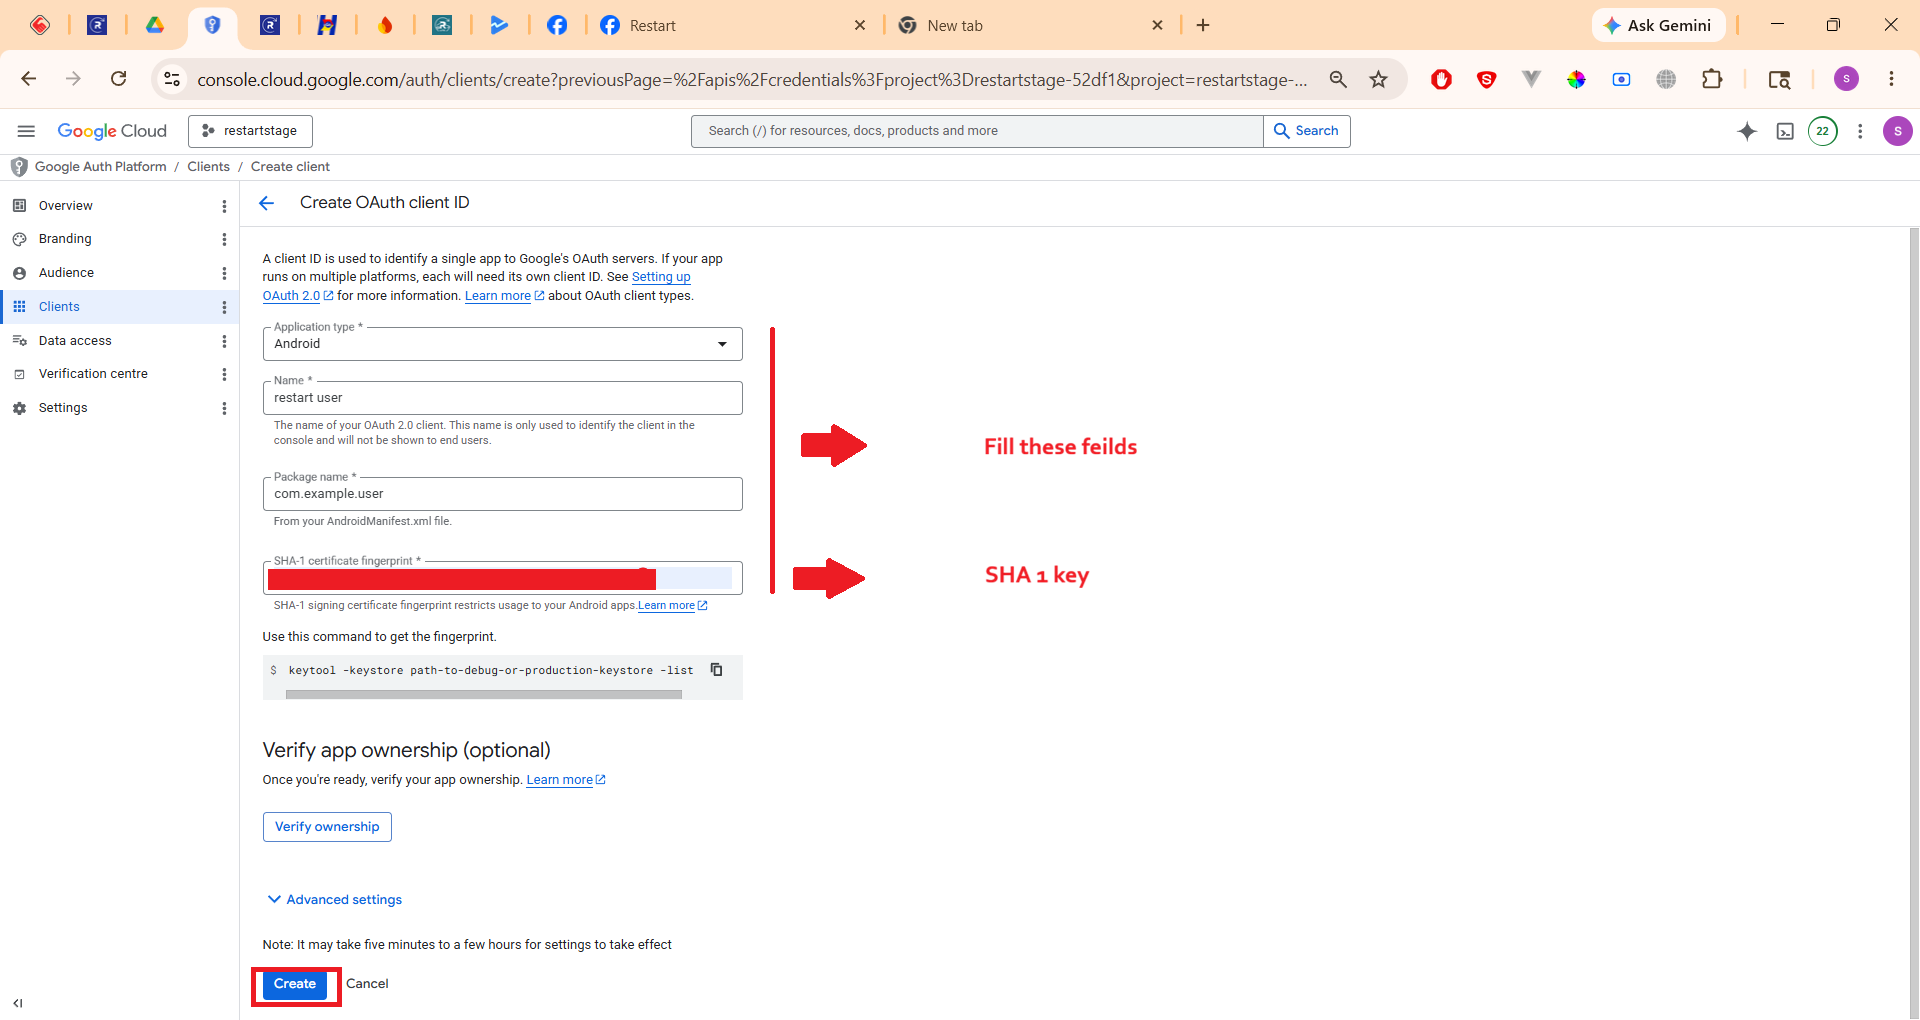
Step 1: Create OAuth Client ID in Google Cloud Console
- Open Google Cloud Console and navigate to APIs & Services.
- Click Credentials.
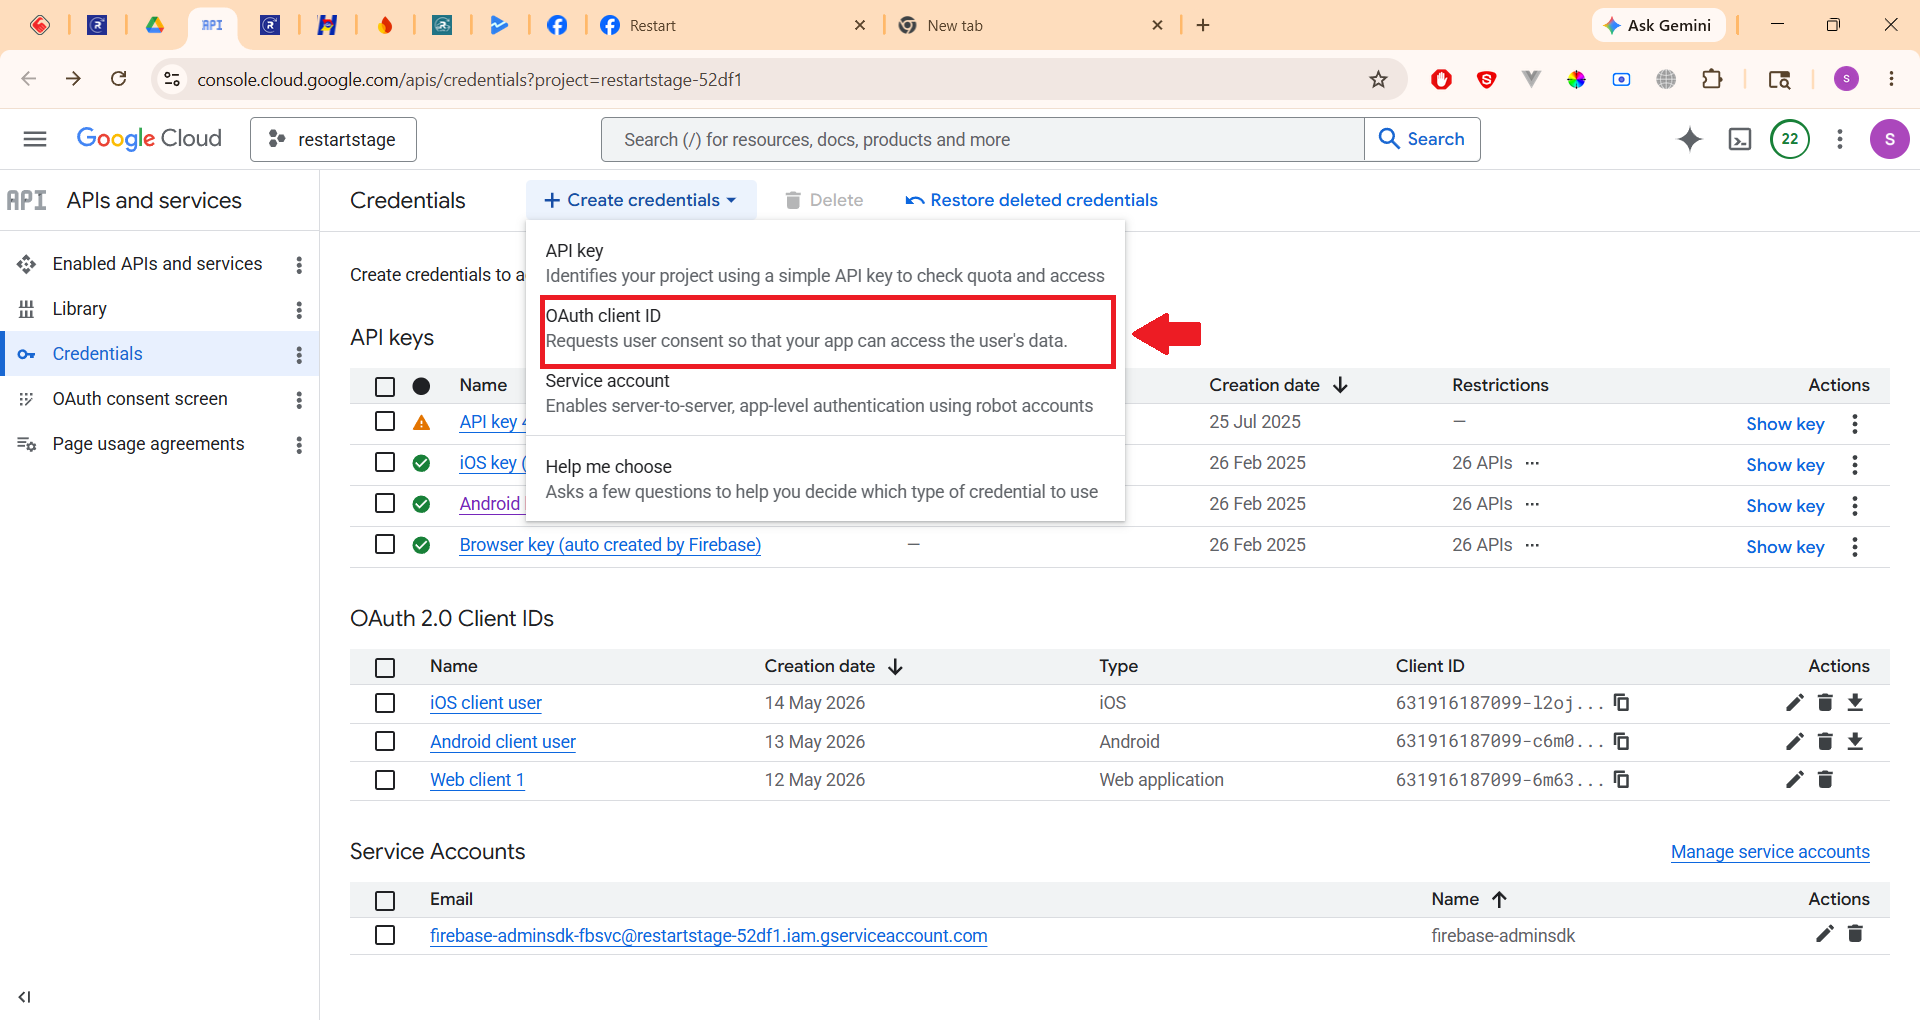
- In the Credentials section, click + CREATE CREDENTIALS.
- Select OAuth client ID.
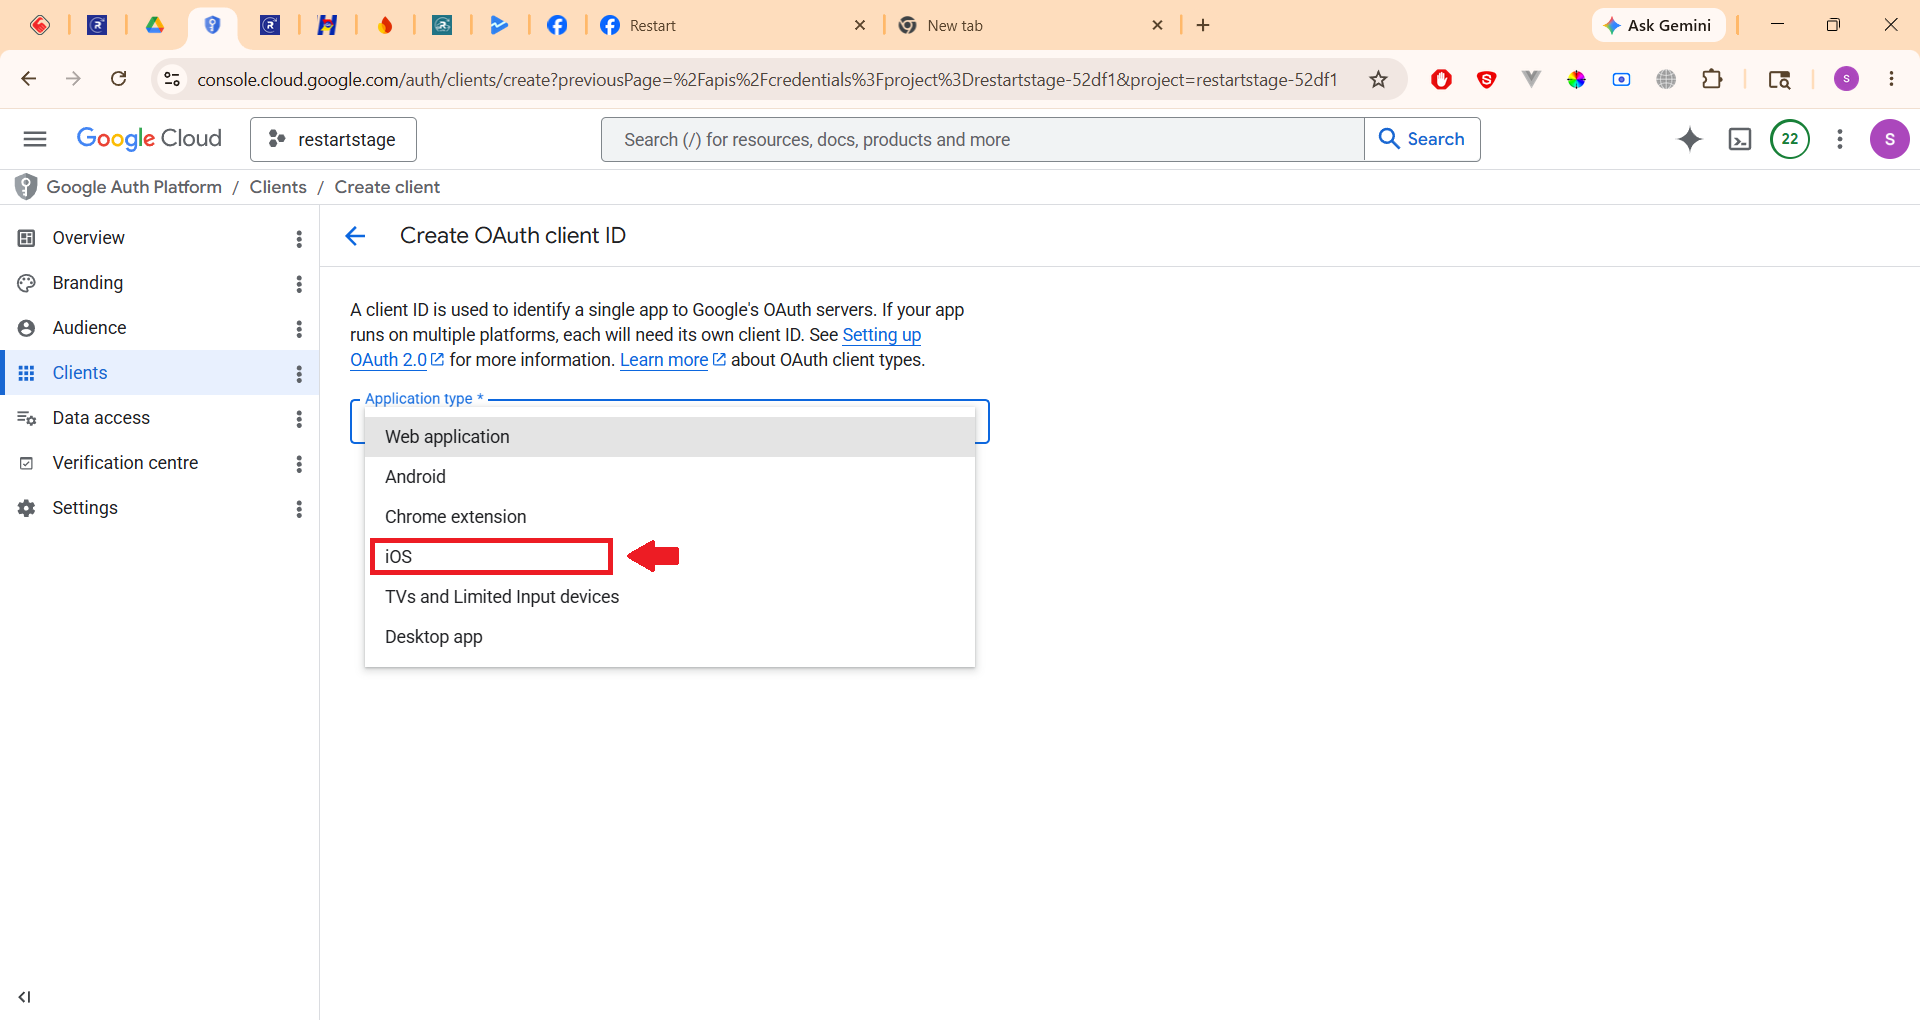
- Choose iOS as the application type.
- Enter the following details:
- Name: Appropriate identifier for the environment.
- Bundle ID: From firebase bundle ID (Example:
com.app.user)
- Click Create
Step 2: Configure Client IDs in Project Code
- Open project source code.
- Navigate to auth_bloc.
- Locate the google_login section.
- Select OAuth client ID.
- Set the following values:
- Copy the Client ID from the iOS OAuth Client created in Google Cloud Console.
- Paste it into the iOS Client ID identifier.
- Copy the Client ID from the Web OAuth Client in Google Cloud Console.
- Paste it into the Server ID identifier.
iOS Client ID:
Server ID:
Step 3: Configure URL Schemes in Info.plist
- open:
ios/Runner/Info.plist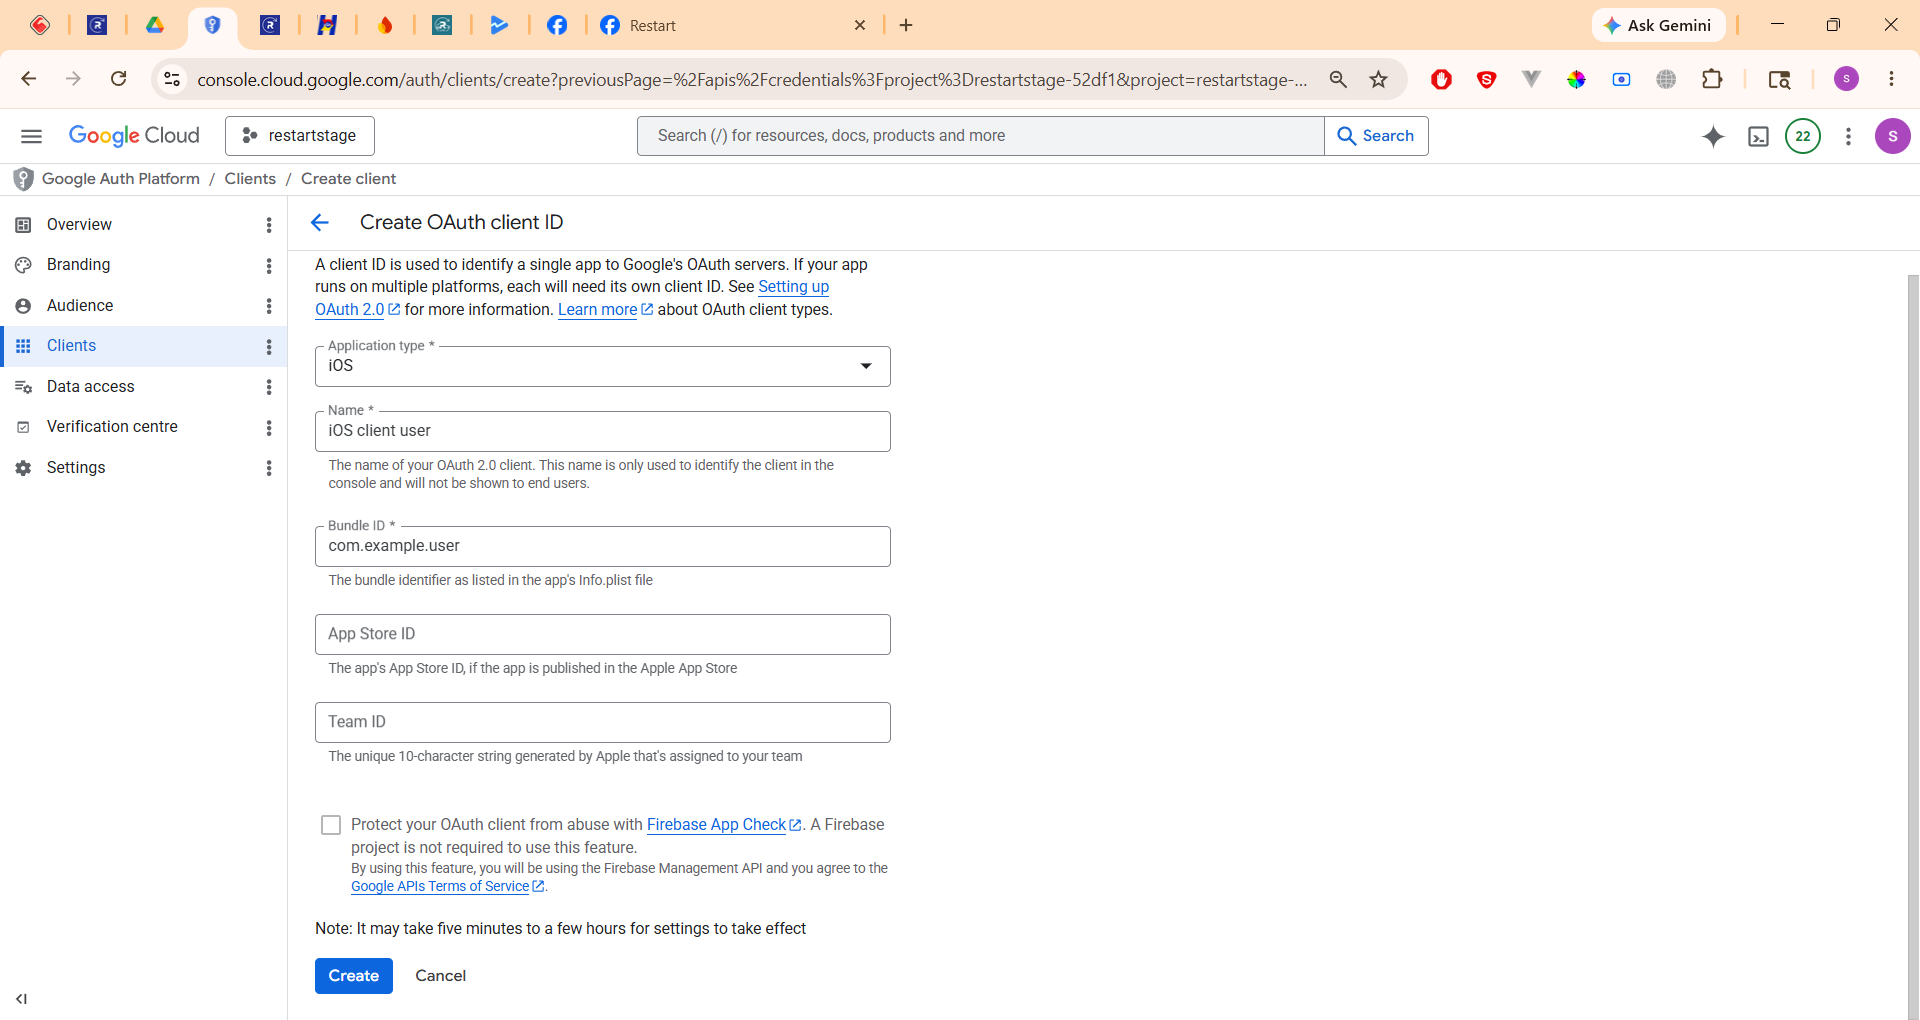
2. Configure Sign in with Android
Google Sign-In Configuration
Step 1: Create OAuth Client ID in Google Cloud Console

- Open Google Cloud Console and navigate to APIs & Services.
- Click Credentials.
- In the Credentials section, click + CREATE CREDENTIALS.
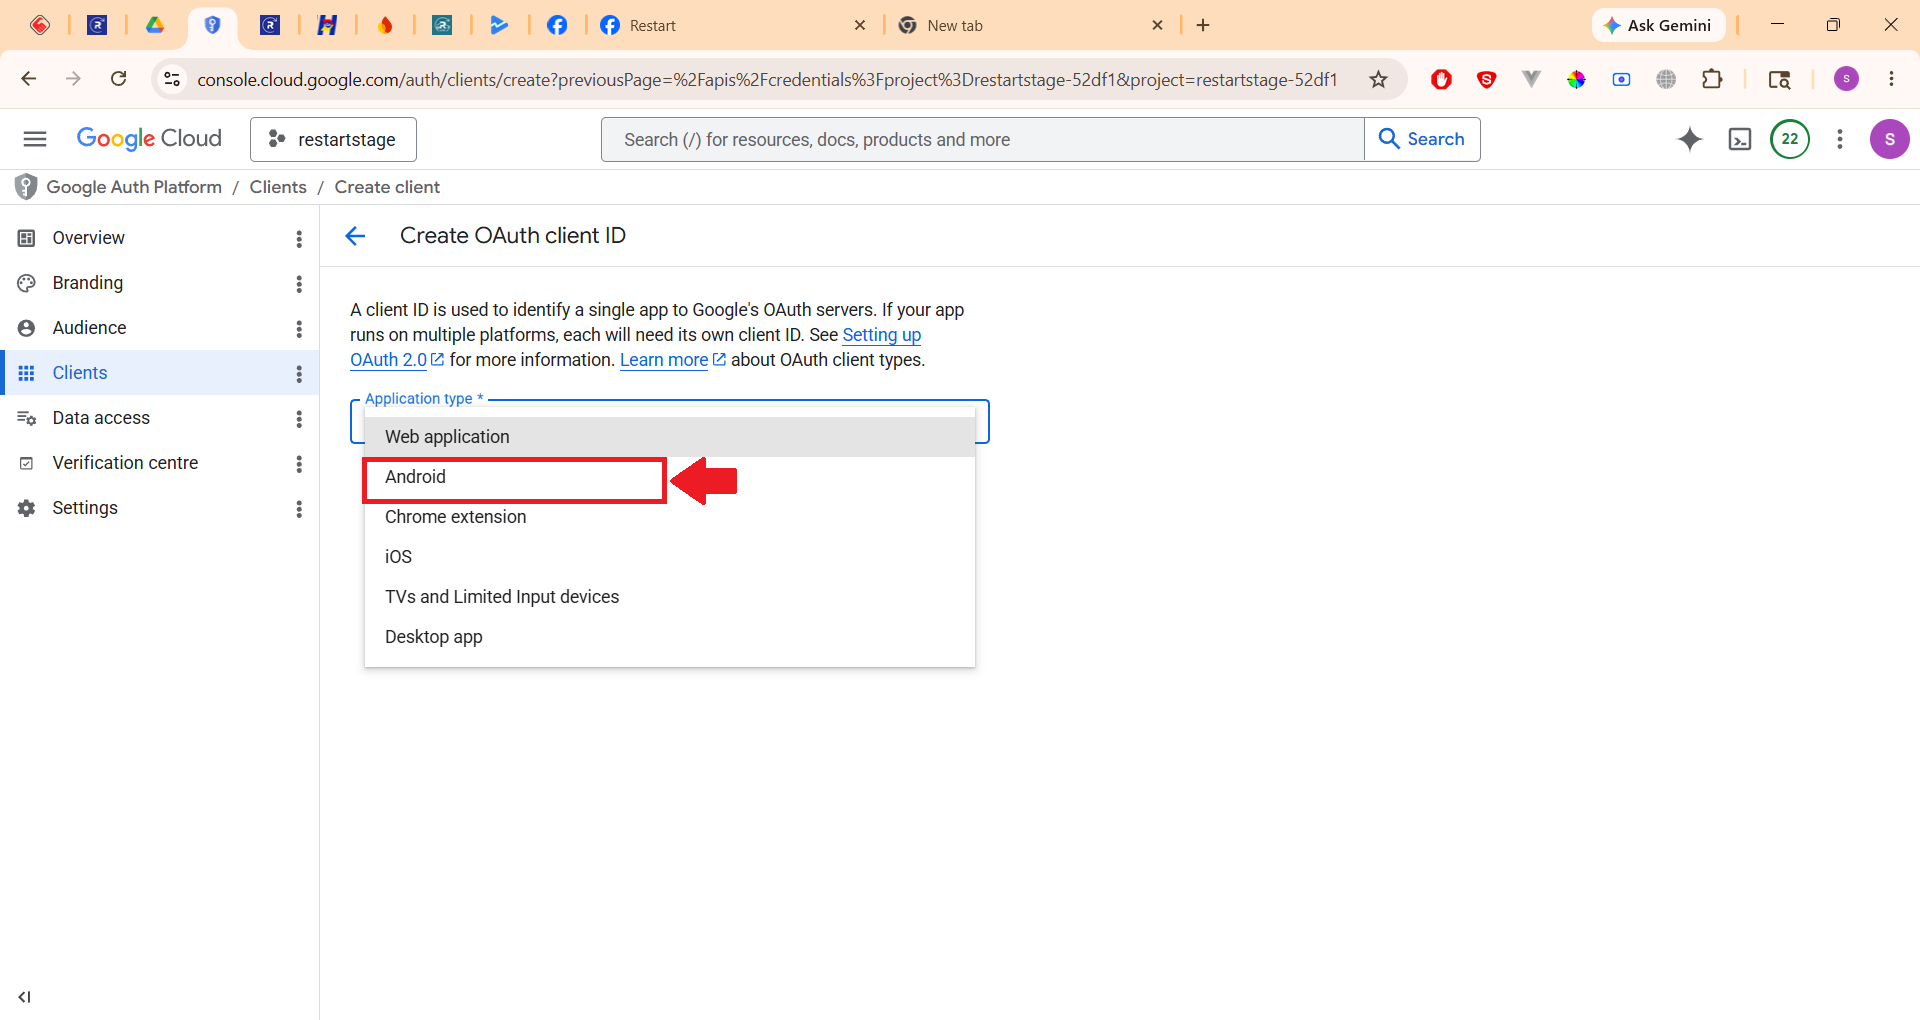
- Select OAuth client ID.
- Choose Android as the application type.
- Enter the following details:
- Name: Appropriate identifier for the environment.
- Package Name: From Firebase package name (Example:
com.app.user)
Step 2: Obtain SHA-1 Certificate Fingerprint
- Open the project source code.
- Open the terminal inside the
androiddirectory. - Execute the following command:
./gradlew signingReport- Copy the SHA-1 fingerprint from the required build variant (Debug or Release).
- Paste the SHA-1 Certificate Fingerprint into the OAuth client configuration.
Step 3: Create Separate OAuth Client IDs
- Create separate OAuth Client IDs for:
- Debug
- Release
- Live (Play Store SHA-1 Key)
- The Play Store SHA-1 Certificate Fingerprint should be used as the Live SHA-1 key.
Step 4: Obtain Play Store SHA-1 Certificate Fingerprint
- Open Google Play Console.
- Select your application.
- From the left navigation menu, select Protect with Play.
- Expand Play Store Protection.
- Click Manage Play App Signing.
- Copy the SHA-1 Certificate Fingerprint.
- Use this SHA-1 value when creating the Live Android OAuth Client ID in Google Cloud Console.